Yay For Valentine’s Day!
Make your Valentine a Valentine’s Day Pop-Up Card
A Pop-Up Card How-To and DIY
Estimated Reading Time: 4 minutes
In my Elementary School in America it was tradition for the first and second graders to bring Valentine’s cards for all of their classmates. The BFFs gave each other the prettiest cards, the other kids got the simpler ones. But everyone got them and felt loved for at least a day.
Now during Corona, I think it is really important to remind your friends that you are thinking of them. What better way than with a hand-made Valentine’s card? Follow my quick and easy steps and you’ll have your Valentine’s Day Pop-Up Card production up and going in minutes!
Instructions
I’ve added some Pro Tips if you really want to make a nice and neat card. If you prefer to do this down and dirty, you may skip them.
Time to make: About 15 minutes
Materials
- 3 sheets of A5 card stock (148 x 210 mm / 5 ¾“ x 8 ¼“)
- Scissors or craft knife
- Colourful (brush) markers, for example in red and pink
- Straight edge or ruler
- Folding tool or butter knife
- Pencil (and maybe an eraser)
Step 1
Fold two sheets of card stock in half lengthwise. Pro Tip: Measure to the middle (55 mm or 8 ⅛“) and mark it lightly with your pencil, lay the ruler across the marks and draw your knife or folding tool along the ruler to make a crease in the card. This is called “scoring” the card. The crease you just made is on the outside of the card. Fold your card away from the crease. It may seem counterintuitive, but this makes for a better fold.
Step 2
Pro Tip (optional): Set one card inside of the other and close them together. Even though the paper is the same size, the inner card will stick out a little. Mark the excess with your pencil, and cut it off with your scissors or craft knife to create tabs.
Step 3
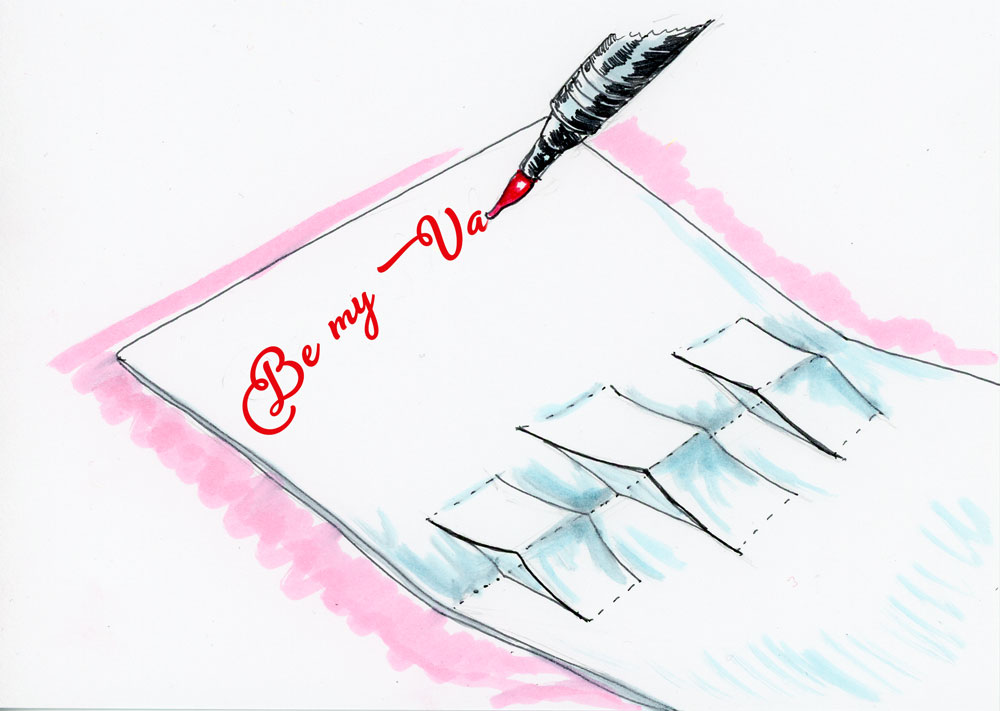
If you haven’t done it already, remove the inner card and set the outer card aside. With the inner card folded, draw lines as in the picture starting from the creased side of the card. In my example I created three areas, which I will call “tabs”. Cut these lines with your scissors or craft knife. Pro Tip: Flatten the card with the inside downwards. With your ruler and folding tool or butter knife score the folds of the the tabs.
Step 4
Push the tabs through to the other side of the card. Have a little patience, this can be a little fiddly. The tabs should resemble little buildings on the inside of the card.
Step 5
Open the inner card flat and write your Valentine’s Day message on the top with marker, i.e. „Be my Valentine“. Decorate the bottom half with tiny colourful hearts.
Step 6
On the third piece of card stock draw three hearts between 4-5 cm / 1 ½“-2“ high and no more than 5 cm / 2“ wide in marker. Cut them out.
Now it is time to marry the pieces
(pun intended)
Reading Suggestions
If you enjoyed this DIY post, then you might enjoy the others below. Remember to sign up for the Kreativnews for more creative news and impulses.
[sibwp_form id=5]
This article was inspired by a Facebook event from Sandrushka. I’ve always loved making pop-up cards and thought this is an easy way to pass on that love. If you are are really into making pop-up-illustrations, I suggest the book “The Elements of Pop-Up” from David Carter and James Diaz. The original book appeared in Little Simon, a Simon & Schuster Children’s Publishing Division, NY USA. ©1999.


